Supplies: Champagne glasses… Ikea, Cost Plus and Michael’s all have extremely inexpensive champagne glasses; Martha Stewart Mulit-surface Craft Paint in Glitter, your choice of color {my colors are: florentine gold, peridot + turquoise, and tourmaline}; my applicator of choice is also from Martha Stewart Craft’s line, the foam pouncers – so easy to use and so easy to clean!
Start by cleaning your glasses with alcohol and making sure they are completely dry before you start painting. Since we are using the Martha Stewart Craft Paint, after these glasses cure… they are dishwasher safe! As with all my DIY’s, if you create a project from one of my tutorials please email me pictures… I would love to see them!
Style 1: Gold Glitter. For the first design, I wanted to make the glitter look like it was sneaking up the glass from the base. So that is where we will start ‘pouncing’ the paint onto the glass.
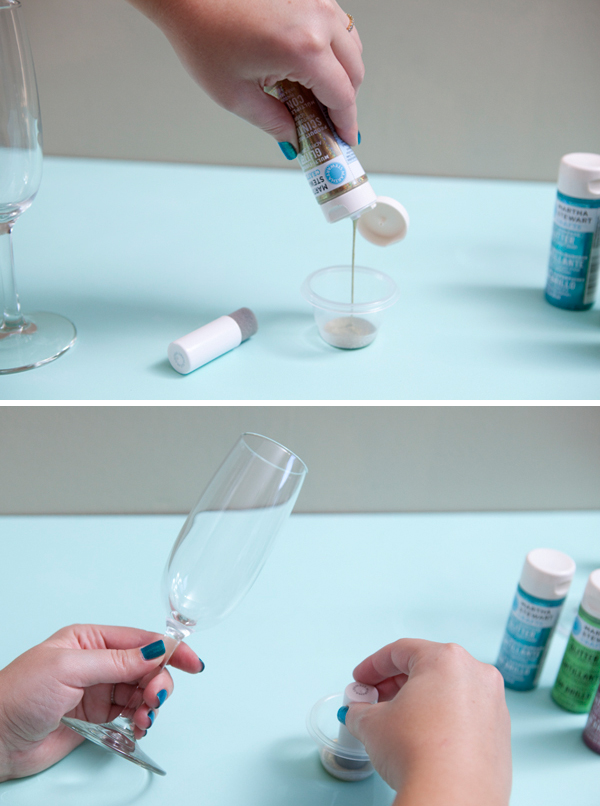
Just keep dabbing and dabbing until a good coverage of glitter starts to develop. All three styles will need at least two coats of paint and at least one hour of drying time in between each coat.
Carefully twist and paint your glass. To get the look of the glitter fading up the glass, paint less towards the rim…
…and paint it more towards the base. I turned my glass upside down to make it easier to paint the base.
Add the bubbly and you are done! Remember, if you want to wash these glasses in the dishwasher you need to cure them using one of the techniques below. Also, paint should not be near where your lips will touch the glass, so try to keep the paint at least 3/4″ away from the rim of the glass.
OVEN CURE: this is the best method for glassware! Simply put your project into a cool oven on a baking sheet, making sure that no part of your project that has been painted is touching anything – the pan, the oven or each other {I put these glasses upside down on my cookie sheet}. Then turn your oven on to 350* and set a timer for 30 minutes. Your glass will not crack because it is cold and so is your oven, the two will heat up together – this is very important. Once the 30 minutes is up, turn off your oven and let your project cool down completely inside the oven. Then it needs to sit for 72 hours before you can use or wash it. This is the best method for this project.
AIR CURE: after painted, let your project air dry for at least 21 days – no using or washing. After the 21 days is up, it should be ready to use and wash. I do not recommend this method for this specific craft. The glitter paint does better with the oven cure method.


Style 2: Personalized Monogram Glass. If you read my DIY from last week I included a personalized champagne glass in the ‘will you be my bridesmaid?” box that I created… this is the glass from that box. In this example you will need letter stickers for your monogram. Start by choosing your letter of the alphabet and placing it on your glass, nice and firm
I wanted to create a box around my monogram so I taped it off using Martha Stewart Craft Paint Stencil Tape. Be careful with the curve of the glass, measure it out if you need to and don’t get discouraged if it takes you a few times to tape it off evenly. It is worth the struggle.
Since of course I wanted a more dimensional turquoise glitter paint, I mixed both blue and green together.
Then using my smaller size pouncer I started pouncing with my mixed paint. Since I wanted a really bold monogram square, I used three coats of paint, with an hour of drying time in between each coat. A good way to check the glitter coverage in this design is by taking a peak from behind.
Once the paint is fully dry, carefully pull the tape and the sticker monogram off. You might even want to softly slide an Exacto knife along the edge of your design and the tape to make a clean brake. If any edges pull up – push them right back down. If any paint bled under your monogram sticker, using your nail gently scratch it away. The paint will be permanent once cured. *Note: if you are using a swirly, thin edged type sticker – you might need to very carefully pull the sticker off before the paint dries, to ensure that the design shows completely and doesn’t peel the rest of the paint with it.


Style 3: Pink Glitter. For this design I wanted to create the opposite look of the gold glass… hot pink glitter sneaking down the glass away from the rim. Since the paint should be kept away from where you will sip your drink, I chose to start this design about 3/4″ below the rim. I taped my line using Martha Stewart Craft Paint Stencil Tape… be careful with the curve of the glass, it might take you a few times to get the tape line straight.
Again, using a pouncer start dabbing the glitter onto the champagne glass. I did two coats of paint, with an hour of drying time in between each coat.
Just like the gold glass, dab much more glitter paint onto the top of the glass and much much less towards the bottom of the glass. So that it looks as if the glitter is falling down the sides of the glass. When the paint is completely dry, remove the tape – you can even softly run an Exacto knife along your design and the tape for perfect tape removal.