- Polymere clay such as sculpey- this can be found in any craft store or even wal-mart, you'll need a package with at least a 4''x4"chunk in it
- Elastic cord- you will only need about 8" for one bracelet. Elastic is so cheap that thou can get five yards for about a dollar
- Clear glass aquarium rocks- find these for cheap at your local dollar store or wal-mart or pet store. They should be small glass "rocks" that are flat on one side and rounded on the other. these come in different colours so be sure to get the clear ones
- A large paper clip
- Eight 1"x1" printed pictures
- Scissors
You will need fairly small pictures to bake the beads. Digital pictures wrk best, because they can be easily resized and cropped in a program like photoshop. Surf the web and find pics of your fav celebs or cartoons or use family and friends pics
You do not need to print them on special paper, just make sure they print out to be 1 inch squares. For best results they should have a 300 pixel resolution
Prepare your beads
Preheat your oven to 275 degrees. See package for instructions
Pinch off about a half inch chunk of polymer clay. Knead the portion you broke off until it is nice and soft, then roll it into a ball. Press the flat side of the glass rock down onto the ball of clay until the glass is half way into the clay. The bulging side of the glass should be facing up. Do not press too far down, you just want to make an indent. Take the bead out. Prepare seven more picture frames in this way.
Place the photo in the bead
Take the tiny photo and place it on one of the picture frame beads, covering the indent you made in step 2. Place a glass rock on top of the picture, press down on the glass rock to sandwich the picture between the rock and clay
Softly pinch the sides of the clay around the bead until extra corners of your pics are not showing and the bead is snug inside the clay shell.
Poke holes for threading
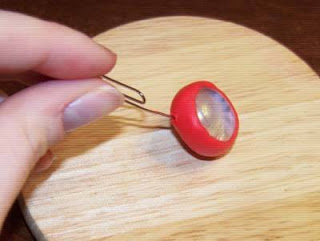
you should have about a quarter inch between the bottom of the glass rock and the bottom of the clay shell. Poke a hole into the middle of this space and gently rotate the paperclip inside that hole to make the hole big enough to fit your elastic cord through. We will put in the elastic cord after the beads are done baking.
Bake the beads
Place the beads upside down on a glass casserole dish or metal cookie sheet. Now pop them into your preheated oven for 10 minutes, when finished, let them cool for another 5 minutes.
After they've cooled, it is time to thread the beads.
Thread the beads
Once your beads are nice and cool, you can get out that elastic cord and a pair of scissors. Cut around 8" of elastic cord and thread it through the holes you made in the bottom of the beads. You may have to stretch the elastic at both ends with threading your last bead.
Don't worry if your cord might be to short, cause the tension will ensure the bracelet isn't too loose or saggy on your wrist, tie the ends of the elastic together i a tight knot.


No comments:
Post a Comment